
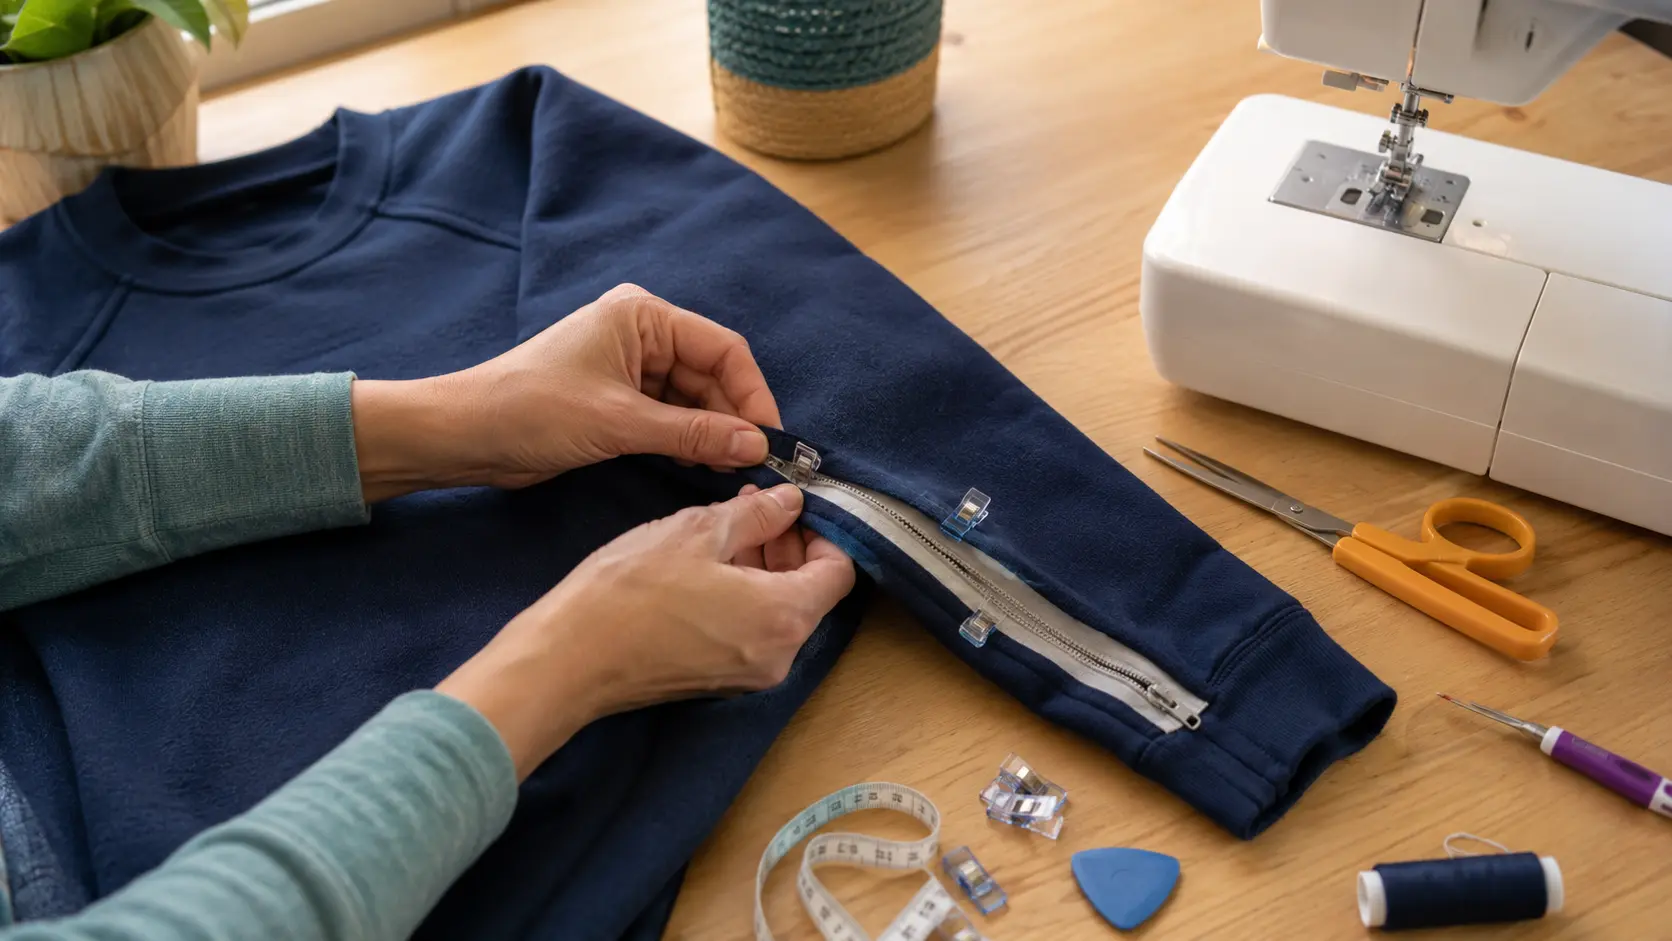
Some people find it easier to modify a favorite shirt at home instead of buying new clothing for treatment days. This tutorial covers two common approaches, a zipper opening and a hook-and-loop (Velcro) opening, so a caregiver, family member, or patient can adapt an existing garment for easier access to a central venous catheter or chest port.
Before you cut anything
Check with your dialysis care team first.
Access location, dressing size, and clinic policies vary from person to person and clinic to clinic. Before permanently modifying a garment, confirm the exact placement with your dialysis care team so the opening lines up with your catheter or port and does not interfere with the dressing.
Never place a zipper pull, snap, hook-and-loop tab, or other hardware directly over an access site or dressing. Hardware resting on the site can irritate the skin or catch on clothing and tubing.
What you will need
The exact supplies depend on which opening style you choose.
For a zipper opening
- A separating (two-way or one-way) zipper a few inches longer than the planned opening
- Fabric scissors and a seam ripper
- Tailor’s chalk or a fabric marking pen
- Straight pins or fabric clips
- Needle and thread, or a sewing machine
- Fusible interfacing or iron-on seam tape for reinforcement
For a hook-and-loop (Velcro) opening
- Sew-on hook-and-loop tape (soft-sided varieties are generally more comfortable against skin)
- Fabric scissors and a seam ripper
- Tailor’s chalk or a fabric marking pen
- Straight pins or fabric clips
- Needle and thread, or a sewing machine
- Fusible interfacing for reinforcement
We are not linking specific products in this tutorial yet. If you would like curated supply recommendations with affiliate links added, let us know which specific products to feature and we will add them.
Step 1: Choose and confirm placement
- Put the shirt on and mark, with the shirt on a table afterward, roughly where your catheter or port sits.
- Confirm that location with your dialysis care team before cutting anything.
- Plan the opening so it sits to the side of the access rather than directly on top of it.
Step 2: Measure and mark
- Lay the shirt flat and smooth out the fabric.
- Measure the planned opening length, generally a few inches longer than the dressing so staff have room to work.
- Mark the opening line with tailor’s chalk or a fabric pen, and mark a parallel guide line on each side to keep your cut straight.
Step 3: Reinforce before you cut
Knit fabrics can stretch or fray once cut. Iron a strip of fusible interfacing to the wrong side of the fabric along your marked line before cutting. This keeps the edge stable while you sew.
Step 4: Cut the opening
- Cut carefully along your marked line through the reinforced fabric.
- Cut slowly, checking the line as you go, rather than in one fast motion.
Step 5: Install a zipper
- Pin the zipper face-down along one cut edge, with the zipper teeth aligned to the fabric edge.
- Sew close to the zipper tape, then repeat for the other side.
- Fold the fabric back over the zipper tape and topstitch for a flatter, more comfortable finish.
Step 5 (alternative): Install hook-and-loop tape
- Pin the soft (loop) side to one cut edge and the rough (hook) side to the other, so they line up when the opening is closed.
- Sew around all edges of each strip so the tape lies flat.
- Position the rougher hook side away from where it would rest directly against skin near the access, when possible.
Step 6: Finish the edges
Fold under any raw edges and stitch them down so the fabric will not fray with washing. A zigzag stitch or a serger, if available, works well on knit fabrics.
Step 7: Fit check
- Try the shirt on and open and close the new opening a few times.
- Confirm no hardware sits directly on or rubs against the access site or dressing.
- Bring the shirt to your next treatment and ask your care team whether the placement works well for them too.
A reminder
Access visibility and clinic policies vary.
Some clinics have specific preferences about clothing and access visibility. What works well for one patient’s catheter placement may not fit another’s. Treat this tutorial as a starting point, and adjust the design based on your own access location and your care team’s guidance.
The main thing to remember
A zipper or hook-and-loop opening can make a favorite shirt easier to use on treatment days, but placement matters more than the sewing technique. Confirm the location with your dialysis care team before you cut, and keep any hardware away from the access site itself.
Related Renal Care Planner Resources
- What to Wear to Dialysis: A Practical Guide for Treatment Days
- What to Bring to Dialysis: A Practical Treatment-Day Packing Guide
General education only. This tutorial provides general educational information about modifying clothing for personal comfort and convenience. It is not medical guidance. Access placement, dressing size, and clinic policy vary by person and by facility. Confirm placement with your dialysis care team before permanently modifying any garment.